睡意检测
所需要用到的库
dlibscipy
需要注意的事项是,如果需要安装dlib库,需要提前安装cmake库和boost库,同时也需要有VS(并且在模块安装时选择C++桌面开发里面的用于windows的C++ CMake工具),具体如下:

以下是参考blog:
项目源码:
import cv2
import dlib
from scipy.spatial import distance

def calculate_EAR(eye):
    A = distance.euclidean(eye[1], eye[5])
    B = distance.euclidean(eye[2], eye[4])
    C = distance.euclidean(eye[0], eye[3])
    ear_aspect_ratio = (A+B)/(2.0*C)
    return ear_aspect_ratio

cap = cv2.VideoCapture(0)
detector = dlib.get_frontal_face_detector()
dlib_facelandmark = dlib.shape_predictor("shape_predictor_68_face_landmarks.dat")


while True:
    success, img = cap.read()
    # cv2.cvtColor(p1,p2) 是颜色空间转换函数,p1是需要转换的图片,p2是转换成何种格式
    gray = cv2.cvtColor(img, cv2.COLOR_BGR2GRAY)  # 将img转换为灰度图
    faces = detector(gray)  # 人脸检测
    for i in range(len(faces)):
        print(faces[i])
        face_landmarks = dlib_facelandmark(gray, faces[i])
        leftEye = []
        rightEye = []

        for n in range(36, 42):
            x = face_landmarks.part(n).x
            y = face_landmarks.part(n).y
            leftEye.append((x, y))
            next_point = n + 1
            if n == 41:
                next_point = 36
            x2 = face_landmarks.part(next_point).x
            y2 = face_landmarks.part(next_point).y
            cv2.line(img, (x, y), (x2, y2), (0, 255, 0), 1)

        for n in range(42, 48):
            x = face_landmarks.part(n).x
            y = face_landmarks.part(n).y
            rightEye.append((x, y))
            next_point = n + 1
            if n == 47:
                next_point = 42
            x2 = face_landmarks.part(next_point).x
            y2 = face_landmarks.part(next_point).y
            cv2.line(img, (x, y), (x2, y2), (0, 255, 0), 1)

        left_ear = calculate_EAR(leftEye)
        right_ear = calculate_EAR(rightEye)

        EAR = (left_ear + right_ear) / 2
        EAR = round(EAR, 2)
        if EAR < 0.26:
            cv2.putText(img, "sleep", (20, 100),
                        cv2.FONT_HERSHEY_SIMPLEX, 3, (0, 0, 255), 4)
            cv2.putText(img, "!!!", (20, 400),
                        cv2.FONT_HERSHEY_SIMPLEX, 2, (0, 0, 255), 4)
            print("睡着啦")
        #print(EAR)
    cv2.imshow("output", img)
    if cv2.waitKey(1) & 0xFF == 27:
        break
cap.release()
cv2.destroyAllWindows()
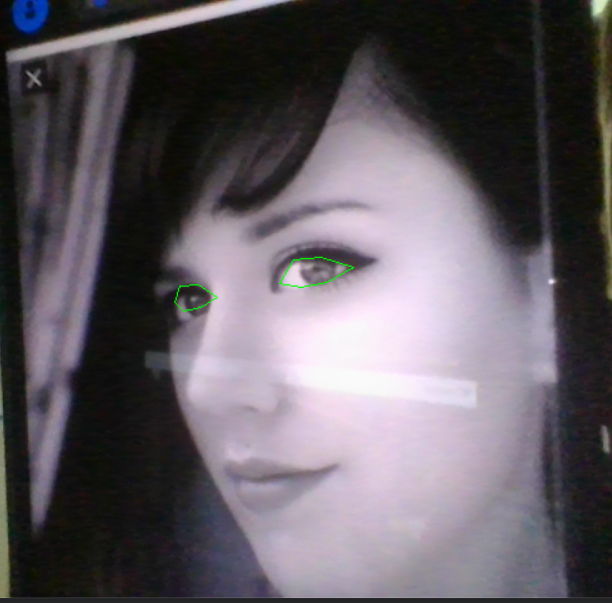
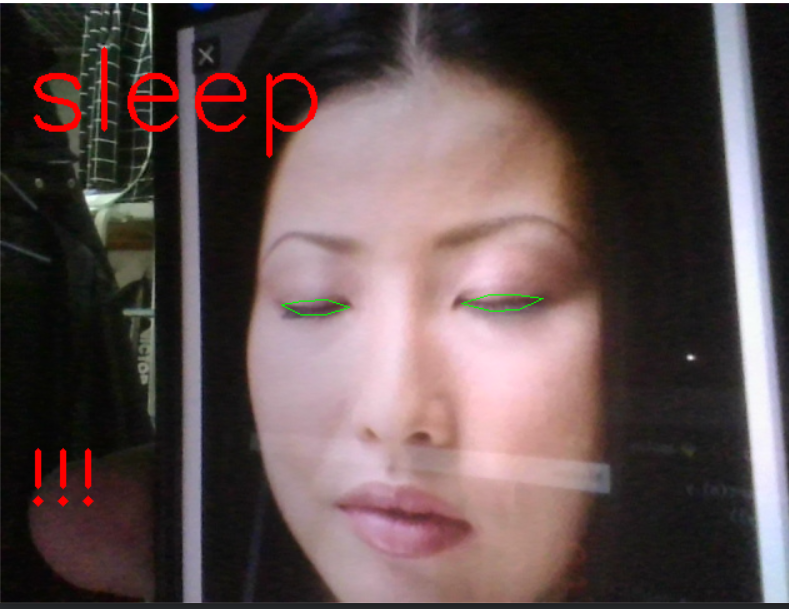
具体效果:
睁眼:

闭眼:

项目反馈:
- 本项目的核心(如何检测人眼的开闭)基于此篇论文(之后还需要对此篇论文进行进一步的阅读)
- 本次项目将放于github,之后的项目也将放入github